Saturday, December 15, 2018

Epson Workforce WF-3640 Keeps Going Offline

My Epson WF-3640 printer kept going offline, even though it was turned on, and connected to my local LAN. I could even use it to scan documents, but I just could not print with it. If I checked its status in Windows, it would show that it was offline:
Not only that, each time Epson's software updater did an update, it could not find the existing printer, so it added another copy of the Epson FAX printer.

The cause of this problem is that Epson printer driver installer installs the printer with a standard TCP/IP port. But when the printer's TCP/IP address changes, Windows will no longer be able to find the printer. You can right click on the printer, select "Printer Properties", and then go to the "Ports" tab to verify this:


I suppose that you can assign the printer a static IP address. But usually this would be too much of a hassle.

It turns out that Epson has a printer port software called "EpsonNet Print". You can google for it, or you can just go to the link http://support.epson.net/win7/updates/network/001_dl.html and download the software there. If you install the Epson printer software combo, it would probably include this as well. But because the date on the combo software is older than the printer driver, people would likely not install this software combo.

Once the EpsonNet Print software is installed, you can add a new port of the type "EpsonNet Print":


This port will work with whatever IP address the Epson printer happens to be on. You would then repeat this for the Epson WF-3640 Series (FAX) printer, and then delete all the other copies.

From here on, each time the printer is turned on, it will always be shown as "online" in Windows.


Thursday, December 13, 2018

Move Resource Group to a New Subscription on Azure Cloud

I have all of my resources in a single resource group. When I tried to move this resource group to a new subscription, I got an error saying that "Move resources specified storage account(s) yourStorageAccountName are not found with sourceSubscription..., sourceResourceGroup yourTargetResourceGroup, targetSubscription..., targetResourceGroup yourSourceResourceGroup."

It turned out that you cannot move all resources in a resource group at once if they are not in the same region. Some of my resources are in the region US West, and some are in the region US West 2.

So, I first selected all resources in the region US West 2, and moved them. After the move was done, I selected all of the remaining resources in the region US West, and moved them as well.

Everything went without any errors.


Tuesday, October 9, 2018

Upgrade Read-only Mode Databases on a SQL Server

Recently I upgraded my SQL server to SQL Server 2017. Everything went well.

But today when I tried to open a read-only mode database, I got an error:

Cannot open database 'DatabaseName' version 782. Upgrade the database to the latest version. (Microsoft SQL Server, Error: 946)

The database could not be detached. When I tried to detach it, the same error occured. I could not view the database's properties, either, because of the same error.

Nothing could be done on this read-only database, it seemed. I did not try to delete it, since I still wanted to keep the data.

Some google results suggested that the file access permissions could be the problem. Not in my case. The database files were fully accessible, both by the SQL sever process and myself.

The solution turned out to be very simple. All I needed to do was to run the following SQL script:

USE master; 
GO 
ALTER DATABASE DatabaseName
SET READ_WRITE; 
GO

When I ran this script, SQL server automatically started upgrading my database:
Converting database 'DatabaseName' from version 782 to the current version 869. Database 'DatabaseName' running the upgrade step from version 782 to version 801.
Database 'DatabaseName' running the upgrade step from version 801 to version 802.
Database 'DatabaseName' running the upgrade step from version 802 to version 803.
Database 'DatabaseName' running the upgrade step from version 803 to version 804.
Database 'DatabaseName' running the upgrade step from version 804 to version 805.
Database 'DatabaseName' running the upgrade step from version 805 to version 806.
Database 'DatabaseName' running the upgrade step from version 806 to version 807.
Database 'DatabaseName' running the upgrade step from version 807 to version 808.
Database 'DatabaseName' running the upgrade step from version 808 to version 809.
Database 'DatabaseName' running the upgrade step from version 809 to version 810.
Database 'DatabaseName' running the upgrade step from version 810 to version 811.
Database 'DatabaseName' running the upgrade step from version 811 to version 812.
Database 'DatabaseName' running the upgrade step from version 812 to version 813.
Database 'DatabaseName' running the upgrade step from version 813 to version 814.
Database 'DatabaseName' running the upgrade step from version 814 to version 815.
Database 'DatabaseName' running the upgrade step from version 815 to version 816.
Database 'DatabaseName' running the upgrade step from version 816 to version 817.
Database 'DatabaseName' running the upgrade step from version 817 to version 818.
Database 'DatabaseName' running the upgrade step from version 818 to version 819.
Database 'DatabaseName' running the upgrade step from version 819 to version 820.
Database 'DatabaseName' running the upgrade step from version 820 to version 821.
Database 'DatabaseName' running the upgrade step from version 821 to version 822.
Database 'DatabaseName' running the upgrade step from version 822 to version 823.
Database 'DatabaseName' running the upgrade step from version 823 to version 824.
Database 'DatabaseName' running the upgrade step from version 824 to version 825.
Database 'DatabaseName' running the upgrade step from version 825 to version 826.
Database 'DatabaseName' running the upgrade step from version 826 to version 827.
Database 'DatabaseName' running the upgrade step from version 827 to version 828.
Database 'DatabaseName' running the upgrade step from version 828 to version 829.
Database 'DatabaseName' running the upgrade step from version 829 to version 830.
Database 'DatabaseName' running the upgrade step from version 830 to version 831.
Database 'DatabaseName' running the upgrade step from version 831 to version 832.
Database 'DatabaseName' running the upgrade step from version 832 to version 833.
Database 'DatabaseName' running the upgrade step from version 833 to version 834.
Database 'DatabaseName' running the upgrade step from version 834 to version 835.
Database 'DatabaseName' running the upgrade step from version 835 to version 836.
Database 'DatabaseName' running the upgrade step from version 836 to version 837.
Database 'DatabaseName' running the upgrade step from version 837 to version 838.
Database 'DatabaseName' running the upgrade step from version 838 to version 839.
Database 'DatabaseName' running the upgrade step from version 839 to version 840.
Database 'DatabaseName' running the upgrade step from version 840 to version 841.
Database 'DatabaseName' running the upgrade step from version 841 to version 842.
Database 'DatabaseName' running the upgrade step from version 842 to version 843.
Database 'DatabaseName' running the upgrade step from version 843 to version 844.
Database 'DatabaseName' running the upgrade step from version 844 to version 845.
Database 'DatabaseName' running the upgrade step from version 845 to version 846.
Database 'DatabaseName' running the upgrade step from version 846 to version 847.
Database 'DatabaseName' running the upgrade step from version 847 to version 848.
Database 'DatabaseName' running the upgrade step from version 848 to version 849.
Database 'DatabaseName' running the upgrade step from version 849 to version 850.
Database 'DatabaseName' running the upgrade step from version 850 to version 851.
Database 'DatabaseName' running the upgrade step from version 851 to version 852.
Database 'DatabaseName' running the upgrade step from version 852 to version 853.
Database 'DatabaseName' running the upgrade step from version 853 to version 854.
Database 'DatabaseName' running the upgrade step from version 854 to version 855.
Database 'DatabaseName' running the upgrade step from version 855 to version 856.
Database 'DatabaseName' running the upgrade step from version 856 to version 857.
Database 'DatabaseName' running the upgrade step from version 857 to version 858.
Database 'DatabaseName' running the upgrade step from version 858 to version 859.
Database 'DatabaseName' running the upgrade step from version 859 to version 860.
Database 'DatabaseName' running the upgrade step from version 860 to version 861.
Database 'DatabaseName' running the upgrade step from version 861 to version 862.
Database 'DatabaseName' running the upgrade step from version 862 to version 863.
Database 'DatabaseName' running the upgrade step from version 863 to version 864.
Database 'DatabaseName' running the upgrade step from version 864 to version 865.
Database 'DatabaseName' running the upgrade step from version 865 to version 866.
Database 'DatabaseName' running the upgrade step from version 866 to version 867.
Database 'DatabaseName' running the upgrade step from version 867 to version 868.
Database 'DatabaseName' running the upgrade step from version 868 to version 869.
What a surprise.

Sunday, September 16, 2018

Completely Uninstall SQL Server 2016

Recently, I upgraded the development SQL database server on my workstation from SQL Server 2016 to SQL Server 2017.

After the upgrade, I tried to uninstall SQL Server 2016 from Windows Control Panel. But after the uninstall, there were still a lot of SQL Server 2016 components on my workstation. In fact, of the several SQL Server components shown in the Windows Control Panel, many would either not go away after uninstall, or would display dependency warnings and refuse to uninstall. In addition, there were many SQL Server 2016 components that were simply not shown in the Windows Control Panel.

So, I had to manually uninstall these components forcefully. First I ran a query for installed SQL Server 2016 components on the command line:

          wmic product where "name Like '%SQL%' and name like '%2016%'" get identifyingnumber,name,vendor,version > c:\temp\SQL2016Components.txt

Here the output file path "c:\temp\SQL2016Components.txt" is specific to my workstation, of course. You would need to change that to a path that is valid to your computer, obviously.

This command can take quite some to run.

After this command was completed, the contents of the output file would look like this:

IdentifyingNumber                       Name                                                                   Vendor                 Version       
{29A56A10-FEB1-4B4F-99DA-8DE4108AA1D8}  SQL Server 2016 Management Studio for Reporting Services Localization  Microsoft Corporation  13.0.16106.4  
{60B9E230-65C3-4A54-9659-1313FBC051B3}  Microsoft AS OLE DB Provider for SQL Server 2016                       Microsoft Corporation  13.0.2164.0   
{DD9B76B0-4B93-4C50-9A9E-4D1C7C3B596F}  SQL Server 2016 Management Studio                                      Microsoft Corporation  13.0.16106.4  
{8A3AE1F0-0752-435D-A01C-033BDD629C8B}  SQL Server 2016 Connection Info                                        Microsoft Corporation  13.0.14500.10 
{B9EED901-157A-4AB8-BFD1-2C6FBF5CF802}  SQL Server 2016 Common Files                                           Microsoft Corporation  13.0.1601.5   
{F8001E21-CFCC-47AD-A3B1-6B3EB6D35E48}  SQL Server 2016 Shared Management Objects                              Microsoft Corporation  13.0.14500.10 
{D3FC7A31-F127-4E2A-96F6-B24FA7D3FFAF}  SQL Server 2016 Shared Management Objects                              Microsoft Corporation  13.0.14500.10 
{1D792861-C84B-4BD0-8347-34AF40F5ACD1}  SQL Server 2016 Management Studio Extensions                           Microsoft Corporation  13.0.1601.5   
{EC234B43-728E-4CA9-8AE6-7815325D6AAD}  SQL Server 2016 Client Tools Extensions                                Microsoft Corporation  13.0.1601.5   
{59200093-D6A8-453E-B1AA-8D5E8921598A}  Microsoft SQL Server 2016 Setup (English)                              Microsoft Corporation  13.0.1601.5
   
...

From the contents of this file, I then created a batch file that looks like this:

msiexec /i {29A56A10-FEB1-4B4F-99DA-8DE4108AA1D8}
msiexec /i {60B9E230-65C3-4A54-9659-1313FBC051B3}
msiexec /i {8A3AE1F0-0752-435D-A01C-033BDD629C8B}
...

For each GUID in the output file of "wmic", I added a line "msiexec /i ..." with that GUID as the uninstall parameter.

Then I ran this batch file from the command line. 

I was getting prompted on each line of the batch file:


I selected "Yes" each time. On some steps, I was getting error popups:


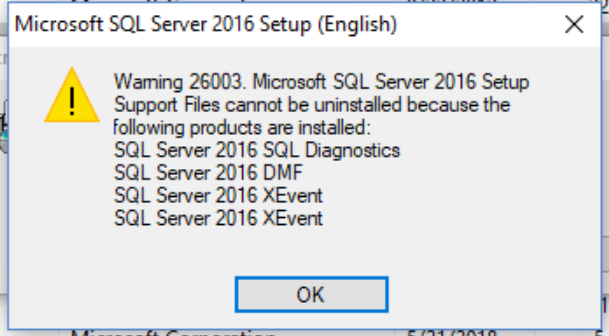
On some other steps, I was getting warning popups like this:


But I continued with the batch file.

I repeated the batch file three times. On the third pass, none of the components remained. SQL Server 2016 was completely uninstalled.

To make sure that the new SQL Server 2017 installation has all the components intact, I ran SQL Server 2017 Setup, checked all of the features that I wanted. The SQL Server 2017 Setup has some problems (http://programount.blogspot.com/2018/06/sql-server-2017-installation-errors-on.html), but once patched, everything works fine.

Thursday, August 30, 2018

IIS, Self-Signed Certificate, and Chrome

Recently, I needed to set up an IIS server for development. I installed a self-signed certificate on the IIS server, since it is never going to be public facing.

It turned out to be a lot of trouble to get the self-signed certificate to work with Chrome.

First I created a domain certificate from the IIS manager. I exported the certificate and installed it on developer workstations' trusted root certificate store. That seemed to work with Internet Explorer and Edge. But it did not work with Chrome.

I read online that Chrome now requires a "Subject Alternative Name".  The IIS manager generated domain certificate did not have a "Subject Alternative Name". Apparently Microsoft's "makecert" does not generate certificates with "Subject Alternative Name" either. So I used the Power Shell command "New-SelfSignedCertificate" and generated a self-signed certificate with "Subject Alternative Name".

That still did not work with Chrome. Chrome's development tool says everything is okay, but the page is not secure (ERR_SPDY_INADEQUATE_TRANSPORT_SECURITY):


These self-contradicting results from Chrome is definitely not helpful to me for solving the problem.

I downloaded IIS Crypto (https://www.nartac.com/Products/IISCrypto/). It suggested a bunch of changes for "Best Practice". I made the changes as suggested, and rebooted the server.

Now Chrome is showing the page without any warnings on the certificate.

This is surprising to me because the server is a new installation of Windows Server 2016. Somehow the out-of-the box settings of IIS on such a server is considered insufficient to Chrome.

Wednesday, June 13, 2018

SQL Server 2017 Installation Errors on "Client Tools SDK" and "Client Tools Backwards Compatibility"

After upgrading SQL 2016 to SQL Server 2017, I noticed that in the "SQL Server 2017 Installation Center", it showed that the "Client Tools SDK" and the "Client Tools Backwards Compatibility" were not installed.

So I checked the two check boxed, and continued with SQL Setup. 

The installations failed. In the Setup dialog box, it had a link to the "Summary.txt" file in "C:\Program Files\Microsoft SQL Server\140\Setup Bootstrap\Log". It contains the following:


Detailed results:
  Feature:                       Client Tools SDK
  Status:                        Failed
  Reason for failure:            An error occurred for a dependency of the feature causing the setup process for the feature to fail.
  Next Step:                     Use the following information to resolve the error, and then try the setup process again.

  Feature:                       Client Tools Backwards Compatibility
  Status:                        Failed
  Reason for failure:            An error occurred for a dependency of the feature causing the setup process for the feature to fail.
  Next Step:                     Use the following information to resolve the error, and then try the setup process again.


What the SQL Setup does not tell you is that there is another log file in "C:\Program Files\Microsoft SQL Server\140\Setup Bootstrap\Log\20180613_091025" called "Detail.txt"! Of course, for you the date time part of the path would be different. It is this "Detail.txt" file that would actually tell you what went wrong:

Sco: File 'D:\redist\DotNetFrameworks\x64\dotNetFx46-x86-x64-AllOS.exe' does not exist
Sco: File 'D:\x64\setup\x64\sql_engine_core_inst.msi' does not exist
Sco: File 'D:\x64\setup\x64\sql_extensibility.msi' does not exist
Sco: File 'D:\x64\setup\x64\sql_inst_mr.msi' does not exist
Sco: File 'D:\x64\setup\x64\sql_inst_mpy.msi' does not exist
Sco: File 'D:\x64\setup\x64\sql_shared_mr.msi' does not exist
Sco: File 'D:\x64\setup\x64\sql_shared_mpy.msi' does not exist
Sco: File 'D:\x64\setup\x64\sql_shared_aa.msi' does not exist
Sco: File 'D:\x64\setup\x64\sql_fulltext.msi' does not exist
Sco: File 'D:\x64\setup\x64\sql_dq.msi' does not exist

Here the drive letter D is where I mounted the ISO file. Obviously, the problem is that the SQL Setup is using incorrect paths: the "\x64\" parts before the file names are not needed. In fact, Microsoft had the same problem in previous versions of SQL Server as well (https://social.msdn.microsoft.com/Forums/sqlserver/en-US/55ad5516-6247-4d7d-ad6c-b4955d59a1df/sql-server-2016-setupupgrade-error-client-tools-sdk-and-client-tools-backwards-compatibility?forum=sqlsetupandupgrade)

So the fix is to copy the entire installation DVD onto a local drive, create the "x64" folder under "Setup" (the other already exists) that the SQL Setup looks for, and copy the files from the parent folders, respectively.

After that, I ran the SQL Setup to install the "Client Tools SDK" and the "Client Tools Backwards Compatibility" again. They were installed successfully without any errors.